Two uses for one roof
A roof terrace and the room under it want different things from the same surface: the terrace wants somewhere to stand, sit and put a table, and the room wants daylight. A roof terrace walk on rooflight lets one flat roof do both jobs, provided the glass is planned as part of the terrace rather than dropped into whatever space is left.
The situation is common across Cambridge. A Victorian terrace in Romsey or off Mill Road gains a rear kitchen extension with a flat roof, and a door from the back bedroom opens onto it. A 1930s semi in Cherry Hinton or Arbury has a flat-roofed garage or ground-floor room below a first-floor window. A newer house at Trumpington Meadows or Great Kneighton comes with a first-floor terrace sitting over a living space. In each case the room below has little or no daylight from the side, because the extension is deep or hemmed in by the neighbours' walls, and the roof is the only place light can come from.
An ordinary flat skylight solves the light but takes away part of the terrace. It stands on an upstand at least 150 mm high, nobody can step on it, and in practice people keep a margin around it for the sake of their shins and their drinks. On a terrace that may only be three metres by four, that can remove a third of the usable floor. A walk-on skylight sits level with the paving or decking, carries foot traffic, and gives the space back. Our comparison of walk-on and standard flat rooflights covers the cases where the raised unit is still the better choice, such as a roof nobody will ever walk on.
This guide is about the terrace case specifically: where the glass goes in the terrace layout, how it meets the terrace finish, what it means for furniture and use, and how to make sure the light lands somewhere useful in the room below. It stays general about products, because walk-on units differ from maker to maker in build-up, rating and fitting detail. For any product question, the maker's declared figures are the ones that count.
Plan the terrace before you place the glass
The best position for the glass comes from two plans laid on top of each other: how the terrace will be used, and what the room underneath needs. Where those two agree, the glass goes in easily; where they clash, it is worth settling the clash on paper first.
Start with the terrace. Sketch where the door opens and where people will walk from it, where a table and chairs would go, where planters or a storage box would sit, and which edge gets the evening sun that people will want to sit in. The route from the door to the seating area is the part of the terrace that takes the most footfall. Glass can sit in that route, since it is designed as floor, but it will need more cleaning there and will show wear in its surface finish sooner. The seating area is where the heaviest static loads sit, from a table, a group of chairs and the people on them.
Then look at the room. In a kitchen below, the most valuable light usually falls on the worktop and the table. In a bedroom or study, you may want light across the room but not on the bed or the desk screen. In a stairwell, light down the flight is the aim, and a narrow strip of glass above the stairs can do a great deal. The light planning work we do before any quote is about this second plan: which part of the room the daylight should reach, and at what times of day and year.
With both plans in front of you, a few placements tend to work well on a terrace:
- A strip along the house wall. The strip runs parallel to the back wall of the house, just clear of the door threshold. It lights the deepest part of the room below, which is usually the darkest, and it sits where people pass rather than where they settle.
- A panel near the terrace edge, inside the guarding. This keeps the middle of the terrace free for a table. It lights the part of the room nearest the garden, which may already get some side light, so it works best where the room below is lit from the roof alone.
- Two smaller panes rather than one large one. Splitting the glass lets the terrace furniture sit between the panes, spreads the light across a longer room, and keeps each pane to a size that is easier to lift and bed.
- A panel in a planted zone. A pane surrounded by planters or a low bench is walked on less, so its finish stays cleaner. The planters need to stay off the glass itself, and clear of its drainage.
What tends to go wrong is placing the glass by the room alone, so that it ends up exactly where the terrace table wants to be, or by the terrace alone, so that it lights a corner of the room nobody uses.

Where the light lands below a terrace
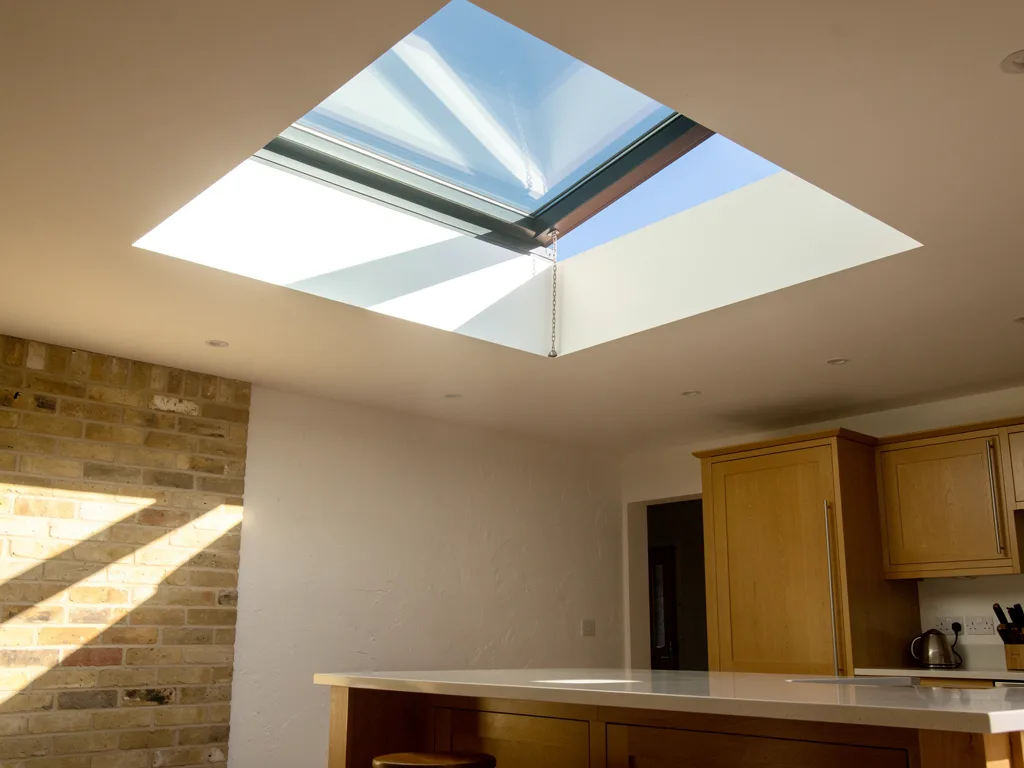
Horizontal glass takes the sun from high overhead, so a pane in a terrace throws a sharp, bright shape onto the floor or wall below it for much of a clear day. Knowing where that shape travels, hour by hour and season by season, is what turns a bright room into a comfortable one.
- Winter solstice, about 14°. The lowest noon sun of the year travels furthest: it crosses the whole room and lands high on the back wall.
- Spring and autumn equinox, about 38°. The light lands on the floor, deep in the room.
- Summer solstice, about 61°. The highest, strongest sun drops steeply and lands close under the window.
- South-facing roof window. The same opening lets in a different patch of light every month.
- Deepest reach. In December the sun patch can be on the wall opposite, which is why we plan where it falls, not just how big the glass is.
Cambridge sits at about 52 degrees north. On a clear midsummer noon the sun is around 61 degrees above the horizon, and on a midwinter noon only around 14 degrees. Under a terrace pane, that means the summer sun patch lands close to the opening, almost directly below it and a little to the north, while the winter sun barely reaches in at all and the room is lit mainly by skylight, the soft light from the whole sky. Through the day the sun patch moves: it starts on the west side of the room in the morning, crosses the floor at midday and climbs the east wall in the afternoon.
The terrace itself changes this in a few ways worth thinking about:
- Walls and parapets around the terrace. A terrace enclosed by a party wall, a raised parapet or the rear wall of the main house shades the glass for part of the day. A pane tucked against a two-storey rear wall on its south side will see very little direct sun, which may be exactly right for a bedroom below.
- The orientation of the terrace. A south-facing terrace with open sky gives the glass the longest spell of direct sun and the most heat. A north-facing terrace in the shadow of the house gives steadier, softer light below, with less glare.
- Furniture and people on the glass. A chair or a person standing on the pane casts a moving shadow into the room below. Over a kitchen this is rarely a nuisance. Over a desk it can be.
- The surface finish. A clear walking surface gives a sharp-edged sun patch. A sandblasted or fritted surface, which terraces normally need for grip, softens and spreads it. We look at this in more detail in glare and pools of sunlight below walk-on glass.
For the room below, the practical questions are where the table or worktop sits, where any screen sits, and whether anyone sleeps in the room. A kitchen table that sits in bright sun for a couple of hours at lunchtime in June is usually welcome. A television on the wall the afternoon sun patch climbs is not. The light plan marks these on the drawing, so the opening is placed before any joist is cut.
Meeting the terrace finish
The glass has to sit level with the finished terrace, whatever that finish is, while the waterproofing underneath stays continuous. How that works depends on whether the terrace is paved or decked, and on the fitting details of the walk-on unit chosen.
Roof terraces over extensions are usually built in layers. At the bottom is the roof structure and deck, then insulation and a waterproof membrane laid to falls. Above the membrane, the walking surface sits on its own supports: porcelain or stone paving on adjustable pedestals, or timber or composite decking on bearers. Rain passes through the joints in the finish and runs across the membrane to an outlet or gutter. The walk-on rooflight sits on a kerb or upstand that rises from the deck, the membrane dresses up the side of that kerb, and the glass sits on top at the height of the finished paving. The membrane and the walking surface are at different levels, which is what lets the glass be flush while the waterproofing still turns up behind it.
- Joists, with doubled trimmers either side of the opening to carry the loads of the cut joists around it.
- Deck (usually 18mm ply or OSB) with a vapour control layer laid on it.
- Insulation boards above the deck (a warm roof), often tapered to give the roof its falls.
- Waterproof membrane dressed up the upstand and over its top, so the joint is lapped, not sealed.
- Upstand, or kerb: insulated timber, finishing at least 150mm above the finished roof surface to keep standing water and splash off the joint.
- Rooflight unit fixed over the kerb, its frame skirt shedding water outside the membrane turn-up.
- Plastered reveal lining the opening from the ceiling up to the frame, finished white to bounce the light down.
- Roof falls to an outlet: designed at about 1:40 so the finished roof never falls less than 1:80.
Some points to settle before the terrace is built or rebuilt:
| Terrace finish | How the glass meets it | What to check |
|---|---|---|
| Paving on pedestals | Pedestals set to bring the paving flush with the glass edge | Even joint around the glass; no pavers resting on the frame |
| Timber or composite decking | Decking trimmed around the unit, with its own bearers | Movement gap left; boards not bearing on the glass |
| Membrane with no finish | Not usually a walked terrace | Whether a finish is being added later |
The total depth of a terrace build-up can be a surprise. Insulation to current Part L levels, falls, a membrane, pedestals and paving together can add a good deal of height above the old roof deck, and the door threshold from the house has to allow for it. A walk-on unit has its own depth too: an insulated glass unit with a thick laminated top layer is deeper than an ordinary double-glazed pane. The unit's kerb height, the finished paving level and the door threshold all have to line up, and they are worth drawing together at the start.
Drainage needs one specific decision: keep the joints around the glass open. Sealing them solid, or letting leaves pack them, pushes water against the frame. The guide to drainage around flush walk-on rooflights goes through falls, outlets and the gap around the unit. Where the terrace is being added to an existing flat roof, the answer on fitting a walk-on rooflight to an existing flat roof covers what changes when the roof is already there.
Under all of this sits the structural opening. A walk-on pane needs continuous, level support around its edges, and on a timber roof that usually means cutting joists and trimming around the gap. That design belongs to the engineer, and it is covered in the structural opening for walk-on glass.
Furniture, planters and everyday terrace life
A terrace is lived on, and a pane in it will have things put on it that nobody thought of at the design stage. The rule of thumb is simple: treat the glass as floor for people, and check the maker's declared rating before treating it as a base for anything heavy or hot.
Walk-on units for domestic use are commonly designed to the floor loads set out for homes in the UK National Annex to the Eurocode, a uniformly distributed load of 1.5 kN/m² and a concentrated load of 2.0 kN. A terrace or balcony can call for different figures from an internal floor, and the structural engineer confirms which apply to your roof. Different makers state their ratings in different ways, and some older units quote only an outdated concentrated figure. So the one reliable step is to ask for the unit's declared rating in writing and compare it with what your terrace needs. Our guide to walk-on rooflight load ratings explains what the figures mean.
For day-to-day use, these are sensible habits, subject always to the specific unit's guidance:
- Chairs and a light table are normally fine on a unit rated as floor, since the load is spread through several legs. Chair feet with soft pads protect the surface finish.
- Large planters filled with wet soil are heavy and sit on small feet, and they hold water against the surface. Keep them off the glass and clear of the joint around it.
- Hot tubs, water features and fixed benches are structural loads that need their own design. They do not belong on the glass.
- Barbecues, fire pits and patio heaters put heat into a small area. Glass does not like sharp local temperature differences, so keep them well away from the pane unless the maker says otherwise.
- Metal chair legs and grit wear the textured surface over time. The answer on whether walk-on glass scratches covers finishes that hide wear.
There is a direct link between this section and the light plan. If the terrace seating area is going to sit on the glass, the room below will be shaded whenever the table is out, and that may be all summer. If you want the light below more than you want the table on the glass, place the pane somewhere else in the terrace. The answer on putting furniture on a walk-on rooflight goes further into point loads.
Grip, weather and the Cambridge winter
An open terrace in Cambridge is wet for long spells in autumn and winter, and it may freeze on still, clear nights. Glass on a terrace needs a textured walking surface, and that texture also shapes the light below.
Polished glass is slippery when wet. The walking layer on terrace glass is normally treated with a sandblasted or etched pattern, a ceramic frit fired into the surface, or a gritted coating, and the result is measured with a pendulum test to BS 7976-2. The figure that matters on a terrace is the wet one. Makers publish their own results for each finish, so compare wet values between products rather than descriptions. The guide to slip resistance of walk-on glass covers the finishes and the test in detail.
From below, the choice of finish is also a lighting choice. A fully sandblasted pane glows evenly and hides the sky, so the room gets diffused light with no sharp sun patch. A dotted frit leaves some clear glass between the dots, so there is a softened view of the sky and some sparkle of direct sun. A clear centre with a textured border keeps the sky view but gives less grip across the middle, which may not suit a busy route across the terrace.
Frost and snow sit on flat glass just as they sit on paving. A walk-on pane is insulated glass, so its top surface can stay cold for a long time on a winter morning, and a shaded terrace may keep a film of ice on the glass after the paving around it has cleared. Some makers offer heated glass for this, discussed in the answer on whether walk-on glass can be heated. In summer the opposite happens: the glass in full sun can get warm underfoot, as paving does.
Privacy between the terrace and the room
A pane in a terrace works in both directions. People on the terrace can see down into the room, people in the room can see up, and after dark a lit room glows up through the glass for anyone overlooking the terrace.
Which of these matters depends on the room below. Over a kitchen or a dining area, a view up to the sky is part of the appeal, and a partial frit that keeps some clarity may be the right balance. Over a bathroom, bedroom or home office, full obscurity is usually wanted, and a sandblasted or fully fritted surface gives it while still letting diffused daylight through. On a close terrace in Petersfield or De Freville, where the neighbours' rear windows look straight across, the evening glow from below may be the bigger issue, and a blind or a lighting plan that keeps the room's brightest lights away from the glass helps. The guide to privacy finishes for walk-on glass sets out the options.
A planning permission for a new terrace can include conditions about obscure finishes or screening, so check the decision notice before choosing a surface finish.
Guarding, planning and Building Control
The glass on its own rarely raises a planning or safety question, but the terrace it sits in usually does. Treat the terrace and the rooflight as one project for approvals.
Guarding follows the terrace, not the glass. A walk-on rooflight flush with the walking surface is designed as floor, so it does not need a rail of its own. The edge of an accessible roof does. Approved Document K sets guarding heights for the edges of balconies and accessible roofs, with 1,100 mm the usual figure for an external balcony or roof edge on a house, and limits on gaps in the guarding. The answer on whether a walk-on rooflight needs a guard rail covers the less obvious cases, such as a pane beside a step in level.
On planning, a flush rooflight projects nothing above the roof plane, so on its own it generally falls within the permitted development rules for houses. Creating a roof terrace, balcony or raised platform is a different matter: it is not normally permitted development, because of overlooking, and in the Greater Cambridge area it is decided by Greater Cambridge Shared Planning. Flats, listed buildings and homes covered by an Article 4 direction have tighter rules. The answer on whether a walk-on rooflight needs planning permission goes through the combinations. Treat this as general guidance and confirm the position for your own property before work starts.
Building Regulations apply to the structural work, the thermal performance and the guarding. Forming a new opening in a roof, or creating a new terrace, is normally notifiable, and we handle the Building Control notification where the work is notifiable. The guide to Building Regulations for walk-on rooflights sets out the parts that apply.
How a terrace rooflight comes together
A walk-on rooflight in a terrace is fitted in the middle of the terrace build, not at the end. The order matters because the glass, the waterproofing and the finish all meet at one edge.
- Survey and light plan. We look at the room below, the terrace above, its orientation and the walls around it, and agree where the light should land. The written quote includes a short light plan setting out position, size, glass and finish, and the reason for each.
- Engineer and product. The engineer designs the opening and confirms the loads. The walk-on unit is chosen against those loads, the wet slip figure and the terrace depth, using the maker's declared figures. Walk-on glass is made to order, so the unit is measured and ordered once the opening size is fixed.
- Opening and kerb. The roof is opened, the structure trimmed and the kerb built level and square, ready for the unit.
- Waterproofing. The membrane is laid to falls across the deck and dressed up the kerb.
- Glass. The unit is lifted in and bedded to the maker's instructions. Walk-on panes are heavy, and the lift is planned in advance; see how heavy a walk-on rooflight is.
- Terrace finish. Pedestals and paving, or bearers and decking, are set to meet the glass edge with an open drainage joint.
How long the whole sequence takes depends on the size of the terrace and whether it is being built at the same time; the answer on how long walk-on rooflight installation takes gives a sense of the programme. If you are pricing a terrace project, the costs page explains what moves the figure, and the walk-on rooflight installation page covers the service as a whole. Our installation work carries a 10-year workmanship guarantee.
Questions people ask
Can I put my terrace table on the glass?
Usually a light table and chairs are fine on a unit rated as floor, but check the maker's declared rating for your specific unit. Bear in mind that a table on the glass shades the room below whenever it is out, so it may be better placed beside the pane.
Will people on the terrace be able to see into the room?
With clear glass, yes. A sandblasted or fully fritted surface stops the view while letting diffused light through, and a partial frit gives a softer, partial view. The finish also gives the grip a terrace needs when wet.
Does a walk-on rooflight need a rail around it on a terrace?
A flush walk-on unit is designed as floor, so it does not normally need its own rail. The edges of the terrace need guarding under Approved Document K, and Building Control checks it as part of the terrace work.
Can the rooflight go in before the terrace is finished?
It has to. The glass is fitted after the opening and waterproofing but before the paving or decking, so that the finish can be set to its edge. To plan a terrace with light below it, book a light survey through our survey form.